Category Archives: Before and After Photos

Chapter 20 – All I wanted was a plunge pool…

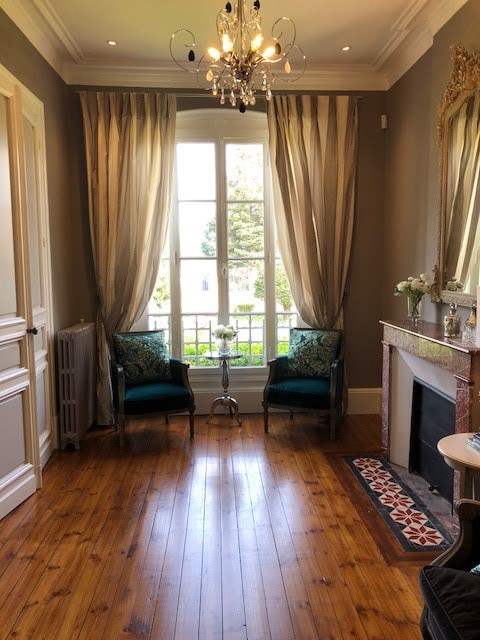
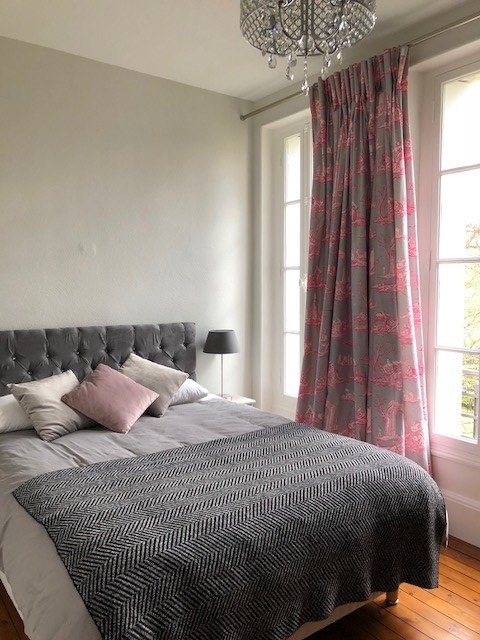
LA ROSERAIE-Site 1.15.18 with furnitur

La Piscine may well be the death of me.  As the title says, all I really wanted was a plunge pool.  I am not a swimmer and have never really been comfortable in the water – my husband, on the other hand is a fish.  I can’t even go into the shower without a cloth to keep my face dry, so you see my dilemma.

Construction on the house began in January of 2017 and the pool was scheduled for the late spring…then the summer…then October we were first on the schedule.  October came and went so I just threw up my hands and said, well, as long as it’s in for the summer of 2018, what does it matter?  Problems stemmed from the inability to locate a mason with room in his schedule to getting permit approvals from the maire.  In the meanwhile, all landscaping around this side of the property has come to a screeching halt.  Had I my choice, I would have waited, but if you want to rent a house in the south of France in the summer, you need a pool.

So on April 13th, 2018, the mason finally showed up to mark out the pool location and where he’d be digging.  We discussed some heights and landscaping particulars and the reality of the size and scope of this pool has hit.  Looking at the orange lines sprayed on my lawn, I am struck with the fact this pool does not seem to be politely nestling into the landscape, but is dominating it in a big way.  Hedges that have been in place almost as long as this house has been here are needing to be decimated and a brand new hedge of bay laurel we had planted last spring for visual privacy that still hasn’t quite fully recovered needs to be removed to allow the back-filling after the excavation of one side of the pool.  I was NOT expecting that.  The pool contractor has now contacted the landscape contractor – but not only is the entire length of hedge in jeopardy, and we’re talking 12 meters of hedge, but it will also be sitting about 40 centimeters below the pool terrace.  For you Americans, that’s roughly 16 inches.  Also not ideal.  We may be faced with removing our bay laurel hedge we had planted at considerable expense removed and may lose it in the process.  Fortunately, I have the weekend to think it over and discuss it with my husband, who is in the United States.  On Monday, myself, the pool contractor and the mason will have a meeting to decide what can be done, but I know one thing for certain – the pool we planned is just too big.

img_0369


April 16th – the long awaited digging begins!  The size was adjusted and we altered the design to only have terrace on three sides of the pool to allow our beloved Bay Laurel to remain untouched.  I was so excited I phoned my husband in the United States via video chat to share in the moment.  With the foundation excavation just over half done, so was the workday with the promise of returning at 8 AM to resume.

April 17th – It is now just past 10 and no mason….the sounds I’ve been hearing all morning are the neighbors rototilling for their spring garden.  Finally, he returns a little after 2 PM and all digging resumes!  I realize I will need to get used to these late arrivals – when they arrive since I am clearly not their only job.  I will say that once the digging has commenced, the pool roars ahead at full speed –


The basic design is this –

The original plan was for a 5×11 meter pool with a 2.5 meter terrace on the long side and 1.5 meter terraces on the other three sides.  The pool will have a 1.5 meter section at 45 cm deep, known as a ‘beach’ with the remainder of the pool at just under 2 meters.  This allows people to swim laps as well as stand upright and play games.  The final size ended up being slightly smaller with the width dropping to 4.5 meters and the length dropping to 10.  The beach reduced to 1 meter and the terrace on the left was eliminated with the terrace on the right expanding to 3 meters. As you can see, the size and scale are still quite large!

And for my part – I made certain the afternoon snack known as ‘gouter’ was provided at 4 every day the crew was here.  It probably didn’t get the pool done any sooner, but hopefully it made the experience a tiny bit more pleasurable for the workers!

Below shows the foundation going in –


Blocks are delivered and waiting to begin construction of the walls and beach –


Below are some details of the steps and engineering of the rebar – If I haven’t said this enough, the level of craftsmanship here is to be admired.


As the walls near their height completion, the filtration system is installed and the interior faces are parged and readied for liners.  There will be a layer of padding, then the vinyl liner over that.


The terraces could now begin.  Because of the particular method this mason uses with continuous metal rebar, they were able to prepare and pour the terraces immediately.  The ground is leveled and compacted, then a layer of sandy material is laid.  Holes are bored and filled with concrete pilings – over that is a fabric membrane, then metal grid, edging, and the concrete is finally poured.  I have fabulous video of this process, but they do not seem to want to load on this site.


Alas, by mid-May it was time for my departure for the United States.  I would not see the completion – in fact, the house was scheduled for our first renter July 4th and they would be the very first to enjoy the fruit of our labors.  If you’ve not been in this area in May, it is bursting with life, grape clusters are setting, the hillsides are rich with the tapestry of the wines of the region, my roses were in full bloom – as were many other species, and even my few little grape vines, although no longer fruit bearing, looked full of possibility.  I was disappointed to not see the pool completed much less have the opportunity to dip into it, but I was full with anticipation of my return and ready to head back to the States.


I returned mid-September to finally get to see the finished pool and begin accessorizing a bit with planters, cushions and additional landscaping.  It was also discovered there were three missing roof tiles, so the timing couldn’t have been better to get that resolved before winter and its eventual rainy season.  Fortunately, the summer had been somewhat dry – bad for the grass and plantings, but very good for someone with a hole in their roof!  It was also an opportunity to harvest my first little crop of lavender which I did with relish.


The final product was more than I could have hoped for – I spent nearly every afternoon soaking up the afternoon sun, swimming in the pool, marveling at the delicate spicy scent of the bay laurel along the length of the pool, and simply bathing in the tranquil and restorative setting we had created – whether reading a book or sipping a glass of wine, it became my treasured time of each day.

And remember that padding I mentioned?  The bottom of the pool is soft to the foot – really lovely.


While the development of the landscaping will be ongoing for some time, one of the things I wanted were three cypress type plantings along this wall to help frame the focal seating area at the end of the pool.  The roses along this wall are very, very old and many doing poorly, so the best solution will be to remove the ailing and replant.  The large blue jardinières will hold palms when spring breaks this year and they become available.  Right now we’re trying to find those that will weather well in a container.


And, of course, given this is LaRoseraie, we will continue to replant roses wherever we can!

img_0660


Chapter 15 – The Salon

Upon first entering the salon of the house we were met with a small yet mighty space – original parquet, elegant mouldings, ceiling medallion, fireplace, and a beautiful window.  The space was tired and old, rich with potential, and small – barely ten feet wide!  The proportions were odd – not wide enough to seat around the fireplace, yet we knew it would be the perfect room for a couple of small seating areas for watching television or quietly reading a book or having a coffee near the window.

Below you see the room before renovation, starting with the wall to the right of the fireplace,  the next picture shows the end wall before the door was added to reclaim every possible inch of storage, and the last two frames show the remainder of the room and the double doors into the entrée.  The last frame shows the floor board added when the two rooms were made into one.  We needed to remove this floor board and replace it with one that would fit more cleanly.

As we were accessing the width, or lack thereof, we quickly noticed something did not add up – the length of the room seemed oddly short in contrast to the front to back dimensions of the house.  A bit of investigating revealed a wall that had been erected, presumably when the heating system was added.  Instead of working the ventilation of the cave for the furnace so that it would remain in the cave – a significant part of the room was removed, so in the place of what had been two rooms off of the entrée, the wall between the two rooms was removed and the remainder of the room at the rear side of the house was added to the room at the front.  Given the fact houses of this era were short on storage, we determined the cave could be contained in a smaller space and a door could be added to allow a good sized auxiliary storage room.

The photo on the left shows a view inside this space after the door opening was cut into the wall.  You can see the new floor beams added and the vent pipe that we had relocated.  Sadly, I had better photo’s of this process and they have been lost in the shuffle. The view on the right shows the finished wall with the elevated door.  It’s a step up, but still maintains an eight foot ceiling – plenty of room for storage shelves, wine storage, linens, and a additional refrigerator.  It is our intention to add a wall curtain to completely conceal the door so when we are away and the house is rented, no one will be the wiser there is another room.  (Unless they read this blog, I suppose!)

As you see here, there is a lovely ceiling medallion that is barely noticed – on the right, after restoration of the ceiling and a new chandelier, it now gets all the attention it deserves.  The chandelier selected is somewhat contemporary and ‘lighter’ scale so as not to overwhelm the space.  Additional recessed lighting was added near the walls to illuminate them, further enhancing the lighter feel of the room.

The after photo’s below show two seating areas – one for a cozy area to watch some television and the other at the beautiful window to either read or enjoy a glass of wine or cup of coffee.  We selected a rich grey tone for the walls in this room to render a cozy, quiet feel despite it’s already intimate scale.  Because the room is narrow, we opted for a couple of ottoman cushions in lieu of a sofa table that would have crowded the space between the sofa and television stand.

Salon 2Salon 1Salon 3

Chapter 13 – Salle a Manger

Upon entering this room, all we saw was potential from its beautiful crown moldings and ceiling medallion to the fireplace and classic French windows –

Before:


In addition to the tired finishes, you can see the ‘darkness’ that seems to penetrate the space.  I suspect spaces that are not lived in eventually hold an oppressive feel that contributes to their lackluster ambiance.

The ceiling was in need of some repair work, but with an excellent painter, we’d end up with ceilings that looked as good as the day they were originally built.  The other big detail would be to replace the base mouldings with ones in better proportion to the whole of the space.

You can see we had tired, tired, tired – ceilings and crown mouldings in need of repair, old wall paper,  outdated and worn parquet and base mouldings, windows and shutters needing repairs, and light fixtures that were…not in keeping with the elegance of the house.  Below you see the after with all new finishes and fixtures.

After:

With newly finished ceilings, walls, floors, windows & shutters, electrical, new base trim, light fixtures, and furniture – this room is transformed to an inviting, elegant dining space.  We let the color on the chair upholstery add just the right amount of panache while all other colors remain soft and subtle.

SDB Base Trim @ window

New Base Trim at Window

New Base Trim

New Base Trim throughout

SAM 3

The new Salle a Manger

SAM 2

Salle a Manger

And last, but not least – the ceiling medallion was saved!

Rest assured, the ceiling medallion was saved!

This is the chandelier we were installing the last time I saw Padre at the house.


Chapter 11: Premiere Etage

The premiere Etage in a French home is the second floor in an American home, and generally speaking is where the bedrooms and bathroom will be located – or in France, the chambres and salle de bain.  LaRoseraie had three bedrooms on this floor and one bathroom – well, sort of…

Chambre One was a jewel from the start.  The walls were ensconced with beautiful mouldings and was a big part of stealing our hearts from the first day.  It was a large room with a big, beautiful window and a fireplace, but had a few issues.  The first was the two venetian glass doors that flanked the bed wall – one went to a passageway into chambre two and the other was a false door, which we assume was there to create symmetry with the other door.  There was also a third redundant door to the left of the entrance door that had presumably been a former means of exiting the room via a partition in the entrée to allow a former madam to make a quick exit to the bathroom across the entrée hall while still in bedclothes.  We opted to leave the latter in place, but affix it permanently shut and to remove the two venetian glass doors, along with the passageway, then refinished that wall – adding mouldings to match the existing.

Fear not! The two Venetian glass doors would not go to waste, as I had committed to saving every possible detail of this house.  They were repurposed as new doors to the two toilette rooms and have added a special charm in both locations.

What you will not notice is the extent of restoration needed to the wall mouldings – the original ones were in worse condition than we initially realized and then additional, extensive damage was caused when the ceilings were replaced, so roughly half of the wall mouldings are actually new – and once the painters were done with them they looked better than they likely looked even when they were new.  As I stated before – if you find a really good painter, they will be worth their weight in gold! After completion, chambre one is the most sought after room to stay –

The other major work needed on the premiere etage were the damaged ceilings from a roof leak that had been resolved when the roof was replaced 10-15 years ago.  What had not been resolved were the damaged ceilings.  The best solution here was to add a layer of steel framing studs, then attach a layer of plasterboard.  This would both support the structure and fully repair the ceilings’ integrity.  All carpets were removed, all wallpaper was removed, walls were repaired, then covered in a layer of textured fiberglass and painted.  The floors were repaired, sanded, stained, and then varnished.  New base trim was added throughout to add a touch of elegance and better proportion, and all electrical was replaced with the addition of recessed lighting and chandeliers in each chambre.  Though each chambre has a fireplace – only the ones in chambre 1 & 3 are potentially useful.  We intend to have each fireplace inspected and will consider gas inserts at a future time if possible.

Chambre Two was equal in size to chambre one but with no ornate wall details.  Instead, our obstacle in this room was concerning the passageway that had been used to traverse between chambers’ one and two and the fact the bulk of the water damage had been focused in this room.  Add to that, at some point in time this was the one section of the house that had settled a bit, so the fireplace had been cemented closed, presumably because it was rendered unsafe.  Since we do not plan to use the fireplaces with possible exception to one day retrofitting a few with gas inserts for ambiance and some supplemental heat, this was not a problem for us.  The first order of business, however, would be to remove the passageway and relocate the radiator, then repair the ceiling, walls, floor, windows, etc., add the base trim and ready it for final finishes.

IMG_8285

Chambre 2 had the greatest challenges with its ceiling and the fact it had an unnecessary passageway to chambre 1 – the first order of business was to restore the ceiling, then remove this passageway.  The floor was also in terrible condition from both water and insect damage.  Intent to maintain as much original material as possible, we needed to have several boards replaced.  Once all was sanded, stained and varnished, it looked just fine!

Chambre 2 has the flexibility to have either two single or one king sized bed.

Chambre Three had few obstacles – it was a simple means of  a new ceiling, fiberglass and paint on the walls, new electrical, new floor finish, and base trim.


Once completed, despite being the smallest of the three chambres on this floor, it carries a charm that is uniquely Parisian –

chambre 3.1chambre 3.2Chambre 3chambre 3.3

The Premiere Entrée before:

250

As you can see – from the crumbling ceiling down to the worn floors, this once beautiful space had lost its luster – so it received the star treatment of new ceilings all the way down to refinished floors.

The Premiere Entrée After:

IMG_0103

It was our intent to not only retain as much original detail as possible, but to ensure the finishes and material in the entrees and stair were maintained in the style characteristic of its period.  I found the restored French vintage chandeliers online, the vintage mirror was sourced from Maison du Monde and the draperies were custom made with a vintage Berger fabric by a local artisan.

The final room on this floor would be the salle de bain.  Originally, it housed a bathtub with hand shower, a wall-mounted sink and a bidet.  All of the plumbing had been attached to the exterior wall of the house since the bathroom had been added a number of years after the house was built, so one of the tasks would be to bring this inside for future protection from the cold and potential freezing temperatures.

Salle de Bain Before:

Salle de Bain During:

Once the tile, fixtures and old plumbing and electrical were removed, the task could begin to repair and prepare the surfaces for new finishes.  One thing to note with a house of this construction – not only are all exterior walls stone block, but the primary interior walls will also be stone.  Any walls that were constructed thereafter would most likely be clay tile covered with plaster.  The difficulty occurs when blocking is required for fixtures, radiators, etc. since these substrates provide poor strength for anchoring weighty hardware.  We had one such case in this bathroom.  The electric radiator had been attached to the clay tile wall and after a few months, dislodged and fell off the wall.  The remedy was to add to the porcelain marble-look tile to cover the area behind where the radiator would attach to provide a stronger surface for the wall anchors.  In hindsight, we should have opened the wall, added blocking, then plastered over.

Salle de Bain After:

As you can see, our objective was to give this bathroom/SDB a more vintage feel than we designed for the second floor bathroom/SDB.  The primary components were the utilization of natural materials such as the white marble and charcoal slate floors, and vintage styling through the fixtures where we utilized porcelain and chrome.  The light fixtures also lend a vintage feel, although you’ll notice the ceiling fixture is, in fact, original to the house – it is the ceiling fixture that was in the ground floor entry, re-purposed to add the perfect finishing touch.


Now complete – this bathroom has a large walk-in shower, an oversized sink vanity and a toilette.